
Welcome Entrepreneur,
Today we will go through the steps on how to build an e-commerce store with WordPress. Follow this guide and you will have a Professional Looking Site Within 5 days or sooner, depending on your work and other commitments.
For someone with a basic understanding of websites, the actual setup can take less than a day.
Is WooCommerce a good good option for E-Commerce
There are plenty of reviews on this question. WordPress and WooCommerce are two of the most respected platforms online.
Woo Commerce is still the most popular option for many who choose an online E-Comm option, with one in four E-Comm websites built using the Woo platform.
Many people think by going to a platform like Shopify they will save time getting their site up and running.
There maybe some truth to this, if you have never developed a E-Comm website.
But a done for you, or partly done for you website can cost a substantial amount.
Check out this review.
WordPress and WooCommerce stand alone when it comes to being the most cost effective option to establish an online presence.
They have a huge data base answering any questions you may have on WordPress / WooCommerce, as do some hosting platforms, which I have included as well.
What this Post will Cover
- Why WordPress should be your first choice for setting up a E-Comm website.
- Pre-planning, Costs, Niches.
- Sourcing products and profitability potential
- Selecting Hosting, bandwidth and costs
- Setting up your site
- Plugins, Themes, WooCommerce, GDPR, AntiSpam protection
- Taxes and shipping
- Some marketing tips to keep your costs to a minimum.
Is it Worth it to Build an Online Store with WordPress
Before we start lets make it clear. All that is E-Commerce is not Shopify, or Magneto, or Bigcommerce etc.
And I don’t recommend Wix. I find it restrictive.
With WordPress / WooCommerce you can sell just about anything…
- Digital products
- Physical Products
- Make Appointments
- Services
- Subscriptions
Subscriptions, bookings, memberships all have a small cost involved. There is more information on products at this link.
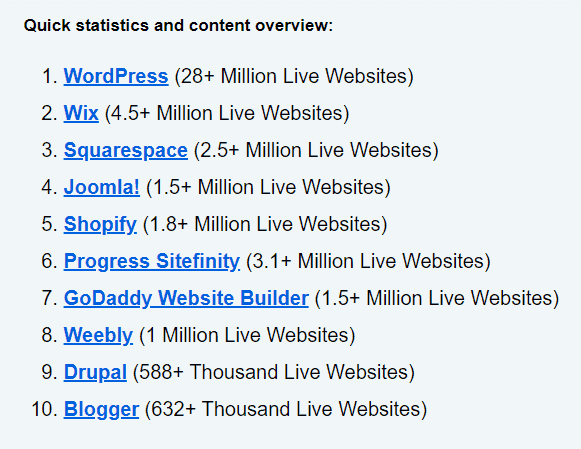
Note:- WordPress has about 46% of online E-Comm websites.
So there is a wealth of knowledge for you to draw on, by using WordPress.
Before you begin, you need to get a few of your ducks lined up.
- What are you going to sell ?
- A name for your store.
- Payment methods
- Shipping costs
The above all sounds pretty basic, lets break it down a little further.
Grab a pen and and note pad. You need to write a little to do list. To the list above, add some notes from the rest of the article.
Finding a Niche for your Online Store
Many people go broad, a bit like firing a shotgun at the side of a wall. You will hit it somewhere.
If you are not selling your own products and intend to dropship, then my recommendation for finding a niche (if you have not settled on an idea), is Pinterest.
Look for products that are profitable.
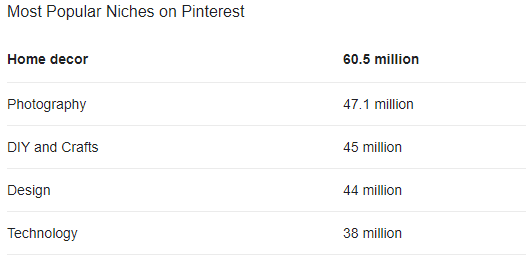
Home Decor is on top. If you think about all the things for a home, you would have a store with a thousand or more products.
You don’t want that. Not at the beginning anyway.
What you do is break it into sections. Say bathroom products, security products, indoor lighting, indoor plants for example.
This way you concentrate on one thing.
It is easier to target an audience who would be interested in one small part of a niche, rather than a scatter gun approach.
The Pinterest list shown above, is only showing the top 5 niches.
This by no means suggests that you should exclude other niches like travel, babies, cycling, health, hiking etc; All of those and many others have a good number of followers on Pinterest, and elsewhere.
You will only ever be able to target a small section of any broad niche with a particular product anyway, so target them, even if there are only about 1 or 2 million followers. Some people do well with way less than that.
What is your interest? Check it out on Pinterest. Once your store is set up, set up a Pinterest business account, if you don’t already have one.
Some more things to consider.
- Get set up as a business with a business name, and the appropriate tax ID’s. You can do most of this online now, by going to your government (state or national), website. Talk to your accountant or lawyer if you are not sure of anything. The Tax ID will be important when dealing with (legitimate), wholesalers.
- Set up a merchant account with your bank. $50 or $100 is all you need to get started in most cases.
- Create a payment gateway. If you don’t have one, set up a PayPal business account. The WooCoomerce default payment is Stripe. Apple Pay is pre-set, and You can add PayPal to your payment set up. PayPAl intergrates with Woo, so, this is easy to get sorted.
- Research If you are not selling your own products, where you are going to source your products from? There are quite a few options (A couple below), some with product downloaders.
- Product downloaders: Selecting your items, from a supplier with product downloader, makes life a little easier. As they automatically feed them into your product file. They come at a cost, and there are pros and cons, I mention more on them below. See a product downloader here. A WooCommerce one Here.
- A European and USA downloader This one generally has a good range of lower end priced products. Integrates fully with WooCommerce. Still, product descriptions downloaded from any product downloader will need editing.
- A good alternative to product downloaders is WorldWide Brands. There is a one off payment involved to buy their catalogue. (Well worth the money), The suppliers have been vetted, and all are genuine wholesale suppliers, unlike some, who are often retailers. A review Here.
- Before deciding on a supplier in your niche, check the prices for similar products online.
- Research shipping costs for those products. If your dropshipping, a good wholesaler will have their shipping costs shown, and included in their download.
- Add 50% to your wholesale price as a starting point. Compare and ask yourself, Can you compete?
- A Domain Name:- Don’t overthink this, Just say what it is. JeffBrownsIndoorLighting.com or MySmartCarAccessories.com, for example. Short, sweet and brandable.
Sorry about that, but there is a bit of brainstorming and a little work to do.
If your not prepared to put a little time into the paperwork (really it is not that much), then you are probably wasting your time with this.
The Costs before you Set up your Store.
With WooCommerce you are in the drivers seat when it comes to costs. Woo is free, but there are extensions that can be useful for your store, most have a free and premium version.
This article is about concentrating on getting your store up and running, without all the bells and whistles, so I am not going into the Woo extensions.
Most of your cost is time, whether your adding your own products, or starting a dropship business.
If dropshipping, there are one or two things that should be considered, looking at a bigger picture.
One is sourcing products. Catalogues generally come at a cost (usually one off, but not always), and you have to contact a wholesaler if you want to add their product to your store.
Which, I think is a good thing. You are establishing a working relationship with the wholesaler.
While those wholesalers may not have an app to download the product, they will have product files you can download and use.
These generally include high quality photos, 3D images that you can zoom, rotate and flip, video demonstrations, product descriptions, shipping costs and delivery times.
I remember spending a whole weekend, including Saturday night, on a computer downloading about 200 products, copying images and writing product descriptions. It was well worth it though.
When I say there are pros and cons with product downloaders, the biggest hassle was you still have to re-write the product descriptions ( some download in broken English), and optimize the photos. In my opinion while useful, the time saving using a product downloader is minimal. They are not expensive though.
In saying that though…The number one thing you want to keep well under control initially, are the recurring costs.
If you can keep your recurring costs to around $30 – $50 a month or less, until you start hitting some home runs, then you stand a chance of making a success of your enterprise.
Most people start it as a side hustle, so they may have time constraints.
Those are the two of the three main reasons for 90% of E-Comm business’s failing. Giving up without developing the business is the other. “Ahh it was only a side hustle.” ?
How many Products should you start with
Lets see… 52 weeks in a year, so… 25 is a good number to start with. You want your store online ASAP.
Add more products once you have your store functioning. You don’t want to overwhelm yourself with too many products at the beginning.
How long does it take to build an online store with WordPress.
Ok, lets get this show on the road, and have you out there making money.
First you need to register your Domain name and Hosting.
You wrote all this down in your brainstorm session didn’t you?
And you have thought about what you are going to sell, and created a Domain name around the products. Haven’t you. Awesome…
Next, review the video below and decide if you need to change anything.
Lets Review 2 Hosting Providers (I will mention a 3rd option), then make a selection for your Hosting.
A host is a platform that will host your website. If you thinking Free forget it, there is a cost involved.
This is where you will register your Domain name as well. Links provided for you to check out their benefits and features.
- Bluehost. One of the originals that is fully integrated with WordPress and WooCommerce. It includes features like payment processing, shipping options and calendar bookings
- Product import suite and order management, and many other features.
- The Domain name is Free for the first 12 months.
- Siteground Comes with WooCommerce pre-installed and is recommended by WooCommerce.
- Includes features like configurable shipping, payment options and order management tools.
- Powerful, fast website loading with 98% satisfaction rate by business clients. 100% renewable energy match.
- 30Day money back guarantee
- Like BlueHost your Domain Name is free.
- Both have free SSL certificates (very important for the search engines).
- Both Bluehost and Siteground offer discounts when you sign up to the yearly plan.
- Consider… There is something like 330,000 Hosting providers world wide. Ask yourself why these two are always at the top of the tree?
- Work with the strongest, you don’t need problems.
If your serious, you might want to think about the next plan up from their basic level ones. They offer a lot more bang for your buck.
Going to a higher plan will actually save you money, by not having to pay extra for other plugins, or increase your band width as your store grows.
A 3rd Option. I have been looking at this. It is not well known, but it looks ok if money is tight.
I will add a 3rd option. It is used by Weebly (number 8 in the list above), and also WordPress. I have never used it. It looks Ok and it might be a little easier on the pocket. It has a 30Day money back Guarantee. WebHostingPadSome things you should know about Hosting
There are a lot of hosting providers touting for your business. Something like 330,000 of them, including GoDaddy and other well known brands.
WooCommerce needs powerful hosting, and those servers need to be functional anywhere in the world, and have the power to serve up highly visual sites quickly.
E-Comm sites with lots of photos, graphics, and text use a lot of power.
This is why I have only focused on 2, because they have a proven track record over many years.
They have better than 98% up time. The last thing a shopper needs to see is a 500 error when they try to load your site, or the page load stalls when someone hits the Add to Cart button.
An all to regular occurrence for many e-comm sites.
The third hosting option I have included looks ok. I have not had a chance to gauge its performance. It is on my list of things to do though. Still, if money is tight, as I said above, it could be a good option for you.
The platform this blog is hosted on is Wealthy Affiliate. Yet its capabilities for hosting multitudes of E-Commerce sites is limited. So I don’t recommend it, nor do the people who run Wealthy Affiliate.
Lets move on…
Themes
You could play with these all day, Don’t.
There are thousands of choices.
There are themes out there that have been specifically built for WooCommerce – which means that they’re excellent at making your products look as compelling as possible.
If the design of your eCommerce store matters to you (and it should), then it may be worth looking at specialist WooCommerce themes.
Click on >Appearence>Themes> and you will be taken to a page like the one below.
There is more detail, but less choice on specialist WooCommerce themes at this link Free and Paid WordPress Themes.
A theme is a plugin, and like all plugins they need constant updating.
Important.
Don’t use Any plugin (including themes), that haven’t been updated for over 3 months. It is likely to conflict with the updated plugins used in WordPress.
If you already have a theme and want to keep it, That is not a problem, if it is optimized for WooCommerce
Otherwise… depending on your choice
Move your pointer over it to check the details and Preview it. If you like it, click Install.
(If you downloaded one, go to your plugin page, click UPLOAD, on the left side near Add New, and drag your zip file to the Add file screen.)
Then go to Plugins, open it, find it in the list and click Activate.
If you have both the 2020 and 2021 WordPress themes installed, delete one of them.
Keep the theme you choose active, and keep the 2020 (or 2021) as a back up theme. Don’t activate it though. Don’t have any more than 2 themes sitting in there.
We do this to keep our websites fully functional and fast loading. Any plugins not being used should also be deleted.
To delete a theme, just move your pointer over the theme cover, the Theme Details box will appear, click on it, it will open, and in the bottom right corner you should see delete in red. Click on it.

Setting up Your E-Commerce Store.
Once you have your Hosting and login details, you will receive an email with a link that will take you to your Dashboard.
This won’t take too long. It is only a matter of download and activate.
What Plugins Do you Need
The Woo-Commerce plugin should already be installed if using Bluehost or Siteground. It is just a matter of activating it.
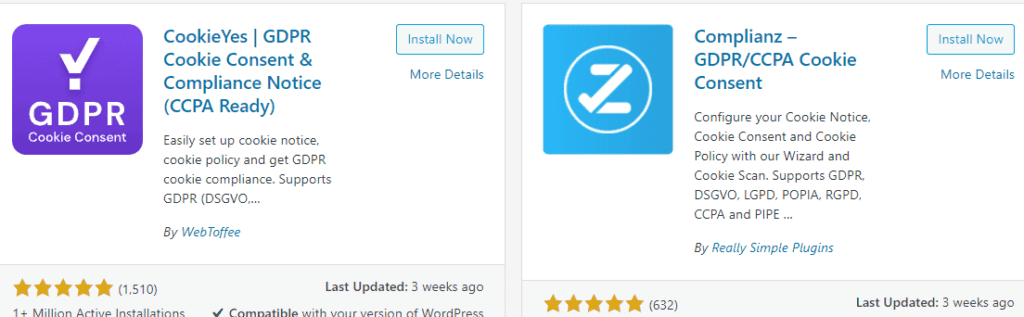
If Bluehost, Siteground or Webhosting Pad haven’t already included an anti spam plugin, get the Akismet Spam plugin, and one GDPR plugin as well.
Siteground and Bluehost (or WebhostingPad), will have a list of suggestions when you first go to your dashboard.
The Woo-Commerce Plugin
Once it is downloaded and activated your dashboard will look like this.
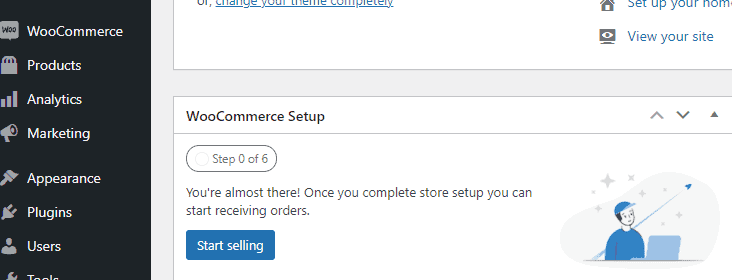
Click the Start Selling button you see beside your dashboard, Your first screen will ask for your details.
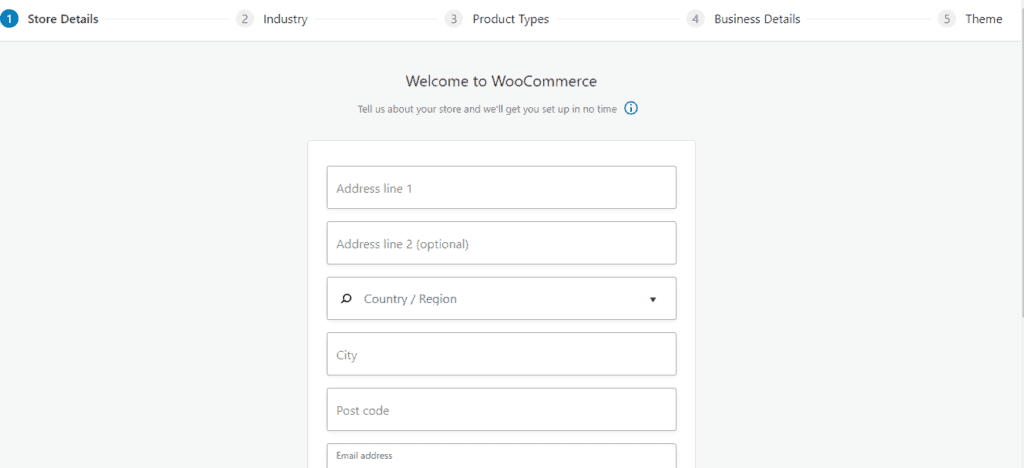
Just follow the prompts and complete all the details accurately. You don’t want to be coming back here, so take your time.
When you get to the Business, you will be asked if you want WooCommerce business features.
Click the Add features box.
There will be an option to add JetPack. Go ahead and add it.
Pretty basic stuff, but be accurate.
WooCommerce

Once you have finished with your themes a screen will appear with some tasks for you to complete. They even have a timer on the tasks ?.
The next things you need to work on, are your Payment, Shipping and Tax values. To see these just hover your pointer over the list in your dashboard. Woo Commerce >>Home
At the top of that page (below), you will see three dots on the right. Click on them and a box will appear saying “Hide This”
Click this if you want to continue setting up in your own way. Otherwise go ahead and complete the details.
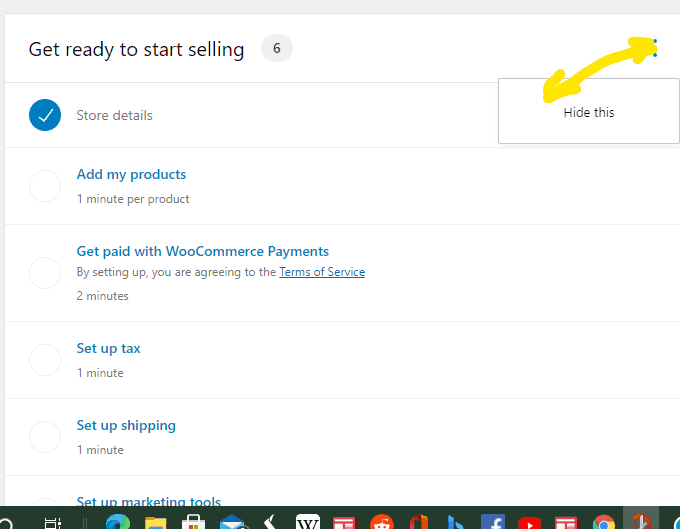
Do payments, and tax and shipping, Get these out of the way before worrying about products.
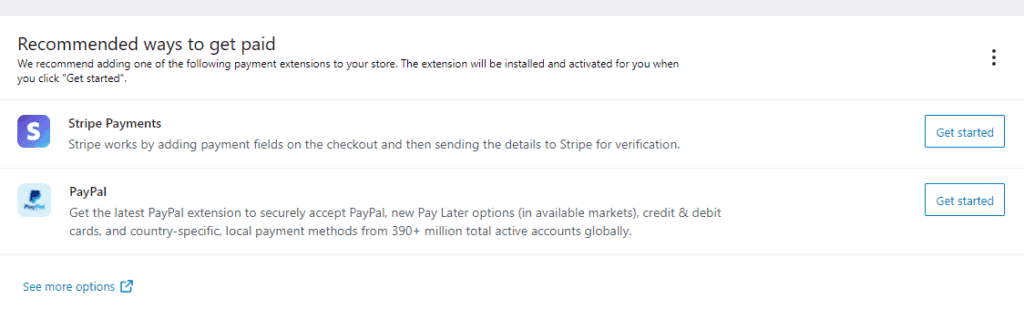
Scroll down to Settings, the screen below will appear. Click on Payments.

If you have set up a PayPal business account as we spoke about above. Connect Woo-Commerce to your PayPal account. Just click on the Get Started button on the right, and follow the prompts.
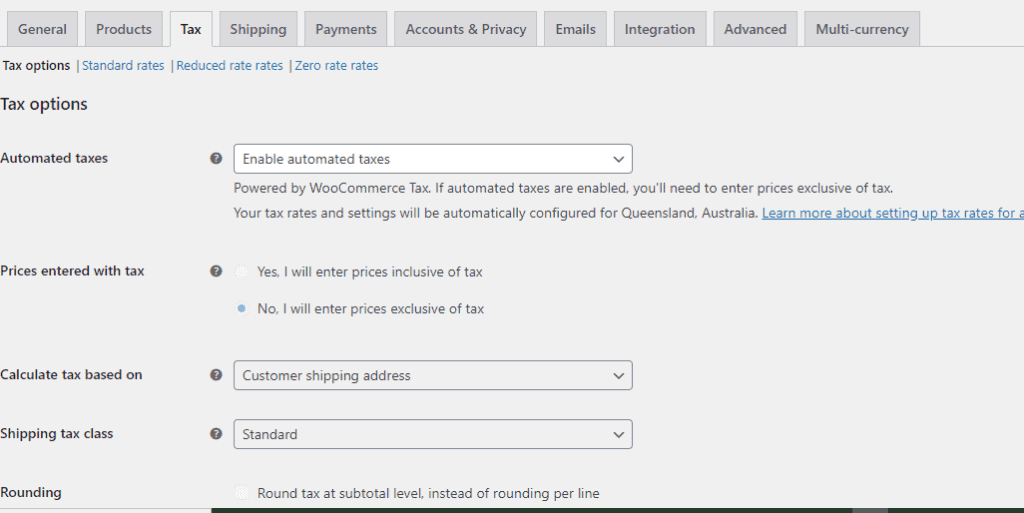
Tax.
Not a popular subject, for those of us not involved in politics, But WooCommerce helps out a little here
Again in the settings page, Enable automated tax rates. Then go to the bottom of the page and Save.
In the section under General, you will be asked your details, make sure you enable tax rates and calculations. Don’t forget to save these settings.
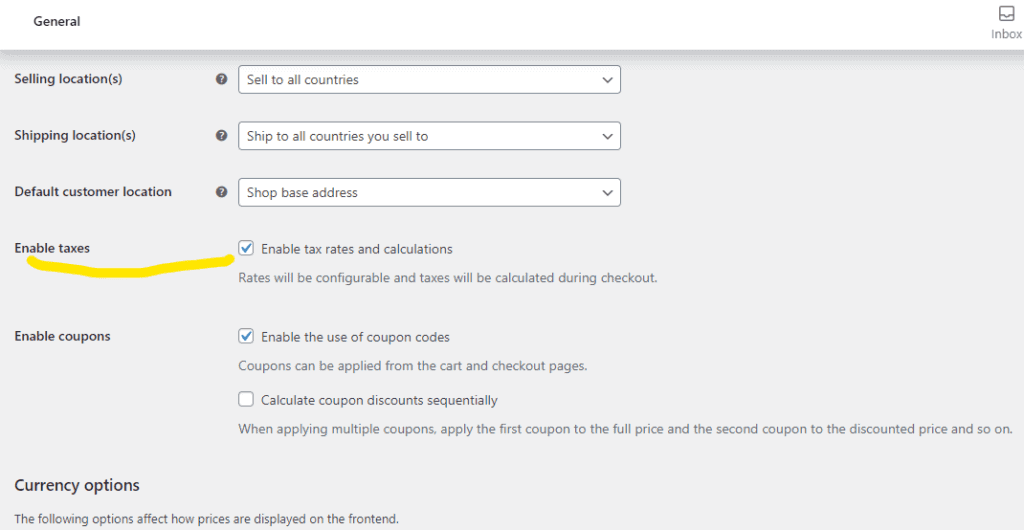
I have entered Standard Tax Rates. You have a choice of 3 options in the top left corner not shown on this screenshot.
Important.
Underneath the enabled automated taxes box, is a link to learn more about setting up tax rates for additional nexuses. (a link between product and country). It is nothing to stress about, but…
Go and have a read of that, if for no other reason than to get an idea of how rates are calculated. You can change the settings later. At this point it doesn’t matter if you don’t get it right.
Generally I set my prices inclusive of tax.
This may work for you it may not. It all depends on where you are.
In your product descriptions you can mention whether your item includes tax or is exclusive of tax.
Don’t forget to save your changes.
Shipping
Often a problem for dropshippers, if they are not using verified suppliers. Your customer needs to get their item quickly and in perfect condition.
So click on the Shipping tab and lets go through this.
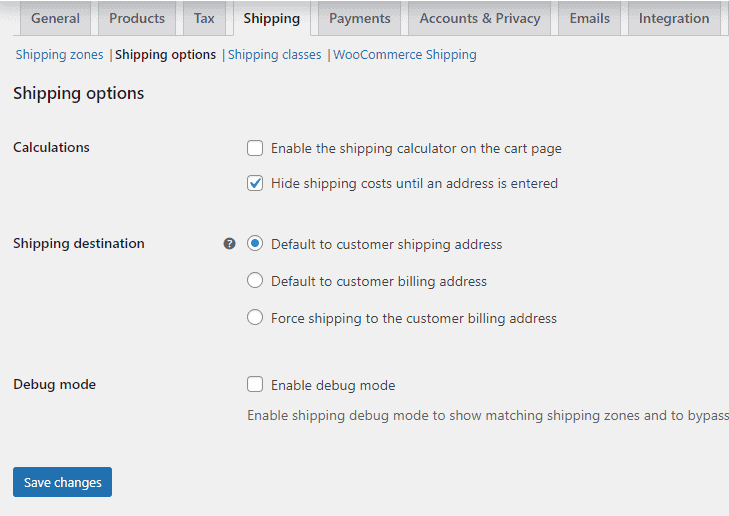
WooCommerce’s default is to enable the shipping calculator on the cart page. Hopefully your Wholesaler or supplier has supplied a set of shipping rates for you. The good ones do.
In some cases shipping will be included in the their price. So all you need do is set a zero rate, which we will come to shortly.
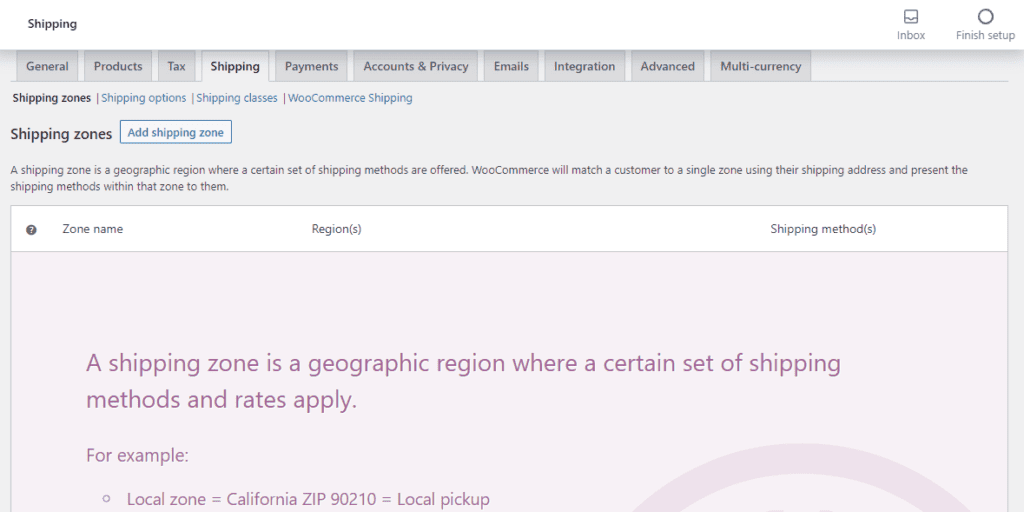
Shipping Zones.
Fairly straight forward. Just go to Add Shipping Zone and add the details. You can limit to specific postal codes and states. You could spend some time on this, if your shipping internationally and setting up your countries.
For the moment keep it simple. refine it after you have some products listed.
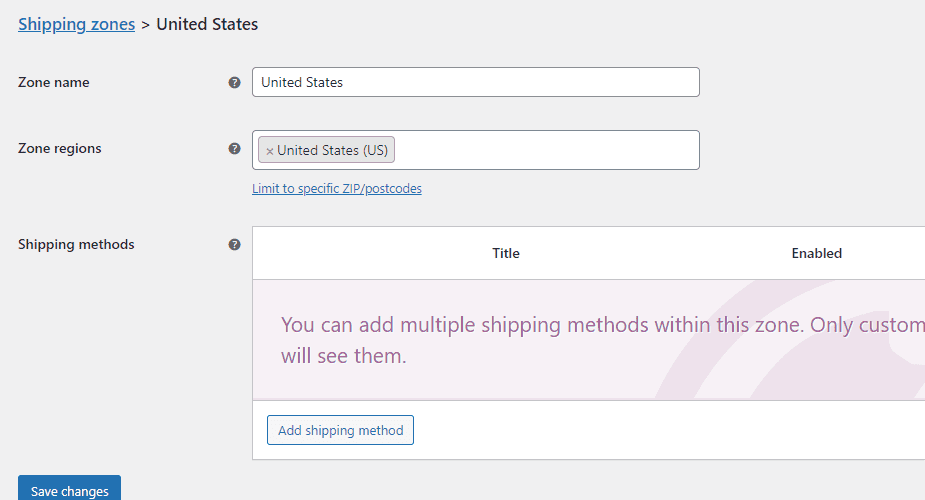
Where you see Add Shipping Method, choose from the drop down list.
There are 3 options in the drop down box to choose from.
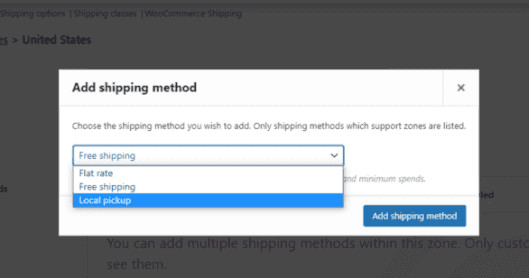

Once you have selected your shipping, go back and click Flat Rate or Free Shipping or Local Pickup (shown above).
It will show an edit or delete choice. Click edit and a popup (like the one below will appear), where you can add your shipping cost.

Save your changes.
One more thing to do before we get into adding Products. ?
In the settings screen there is a Tab Accounts and Privacy. Click on it, then go through it and make your selections. It is all intuitive, and will only take a minute or so.
Your Cart, Checkout, Shop, and My Account pages, were already created for you during the installation and setup stage.
Your Not Quite Done Yet. ? About us Pages, Privacy Policy and other pages Still need to be done.
You will still need to set up
- A Refund policy Woo Helps here. Go to Home and scroll down. Also consider installing a live chat feature in the future for customer support. With E-Commerce, customers need assurance that support is available for their purchases.
- The below pages can be done after you have added your products.
- An About us Page
- A Home Page
- A Contact Page – Some means for customers to contact you.
- A Privacy Policy.
- And an FAQ Page.
Privacy Policy
From the GDPR plugin, there should be a privacy policy in there you can use. It is just a matter of copying and pasting it into a page.
Other wise take a look around your dashboard, there should be a WordPress privacy policy on the right side of that page, about half way down.
If still no privacy policy you can find a free one Here
On your WordPress Dashboard look for pages in the menu. Open it, and click New Page.
A blank page will appear. Add a title, (Privacy Policy), then paste the Privacy Policy into that page. Make changes so that the policy is relevant to your business name.
FAQ’s For your Website
This is in two parts
- One for the site
- One for products.
This is an important page so put some thought into it. It has to be related to your business, and you need to present yourself in the best possible light.
The one for your business could include things like
- Do you give refunds
- How long is the refund period
- Who pays the postage for returning an Item
- What shipping do you use
- What is the best way to contact you
- What are your business hours
That should be enough for the moment.
FAQ’s for your products.
These can help sales immensely. they only have to be between 3-6 questions, but these are invaluable for your products.
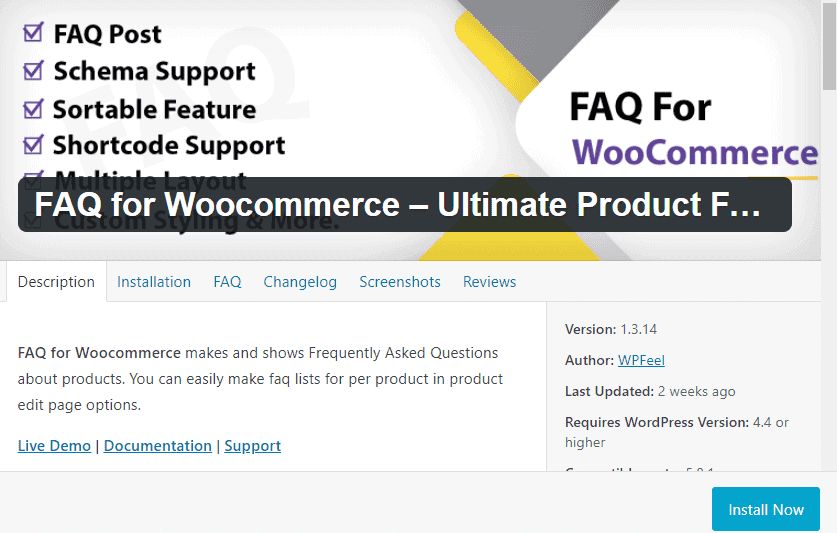
Sounds tricky I know, but there is help available… in the form of a plugin!.
Obviously not every type of product will need one.
So, while we are in the back end of your website lets download another plugin ?.
Go to your dashboard >>plugins>>Add New>> type FAQ into the search bar and look for the one below. There are others of course, It is up to you, just check out the details, and make sure they have been updated recently.
Make a Contact Us Page
This should be pretty straight forward.
Business name, email, office phone if you have one, and an address. Best to place this in your footer. Appearance>>Widgets>> Footer.
About Us Page
This page can be tricky. Here you have to try and connect with your customer. So the page is as much about your customer as it is about you.
You need to include:
- The benefits of your products
- The service you strive to provide
- What customers can expect by dealing with you
This does not have be long, around 350 words will be enough.
Your Home Page.
Make this a welcome page, tell a little about yourself, your business and some future goals, relevant to your products / business and the value of this to the customer.
Again, around 350-450 words should be sufficient.
Adding Your Products
Now comes the time to get your site looking like a E-Comm Store.
Lets make it a good one. You choose a good theme, so creating a good layout should be easy.
When adding a product, the first thing to decide is what type of product it is.
- Simple – covers the vast majority of any products you may sell. Simple products are shipped and have no options. For example, a book.
- Grouped – a collection of related products that can be purchased individually and only consist of simple products. For example, a set of six drinking glasses.
- Virtual – one that doesn’t require shipping. For example, a service. Enabling this, disables all shipping related fields such as shipping dimensions. A virtual product will also not trigger the shipping calculator in cart and checkout.
- Downloadable – activates additional fields where you can provide a downloadable file. After a successful purchase, customers are given a downloadable file as a link in the order notification email. This is suitable, for example, for a digital album, PDF magazine, or photo.
- External or Affiliate – one that you list and describe on your website, but is sold elsewhere.
- Variable – a product with variations, each of which may have a different SKU, price, stock option, etc. For example, a t-shirt available in different colors and/or sizes.
- Other types are often added by extensions. For example, WooCommerce Subscriptions adds new product types as does WooCommerce Bookings.
Go to the Dashboard and click on products. You will see two options.
The first one is Create a Product, clicking that opens a classic WordPress editor.
NOTE: My site is older theme and Classic Editor is the default option for it. I am happy to keep using it until such time as I need to change. You most likely will have Block Editor as the WooCommerce default editor. If this is the case, stick with the block editor. It has a lot more options to help you create great listings.
Here I have all the usual options found in the WordPress classic editor.
- Add product. This is the product title, so try to keep this to about 70 characters. That is all google will show in the search page.
- Add media (photos) Click add media, and upload photos. All photos should be saved to a folder first, then upload them. Tedious I know, but necessary. Keep in mind Pinterest is Visual. Make sure your photos are clear.
- Then, in the white area add a description. Start with a heading, click on the box showing paragraph and choose from the dropdown. In this section only use ONE H2 heading. Any other headings should be H3 or H4. I have never used H5or H6.
As well as adding text, you can also add more images, tables, colored text, videos, lists. You can even add links to other items you have in this section.
On the sidebar in the editing page, you have options for Categories, Product tags ( keep your products organized ), Product photo (the featured Image), and an option to add a photo gallery. Make use of all of these.

The Second Option is for importing from a suppliers CSV product file.
If your wholesaler or supplier supplied you with CSV product data to download his images and products, this is where you add it.
You should have saved it to downloads file on your computer.
Where you see Import Products: Click on it and you are taken to a screen like the one below.
Add the file, and the products will be downloaded and populated into your draft product pages, from there you can edit them. More on this below.
When your done and are happy with the result in the Preview, click on Publish button .
How easy is this? ?

There is a third option. and that is if you went and paid for a Importer. That is a separate plugin that will download your products and populate your draft product pages, from there you can edit them, once done and happy with what you see, click the Blue Publish Button.
There are many ideas as to how you should set out your products. Probably the best way is to have a friend, or your spouse look at a completed page to give their opinion.
Remember it is not about you. it is about your customer.
How to make a good Product Description.
Have the product title to be 70 – 75 characters or less. Any more and it won’t display in the search engine search results.
This is how I generally do a product description layout.
- Add a Photo
- Then a H2 Title. (Click on paragraph and you will see a drop down list).
- Add a H3 heading. Some introductory text.
- Add a H3 heading
- Make a list of 3-5 benefits and features.
- Do a brief description 100 – 170 words
- Add another photo
- Add shipping details.
Note
If your product comes in different colors or sizes look down your dashboard for attributes (under products), open it and add the attributes.
Colors are important. The more visual your products, the more appealing they will be to visitors. Example below.
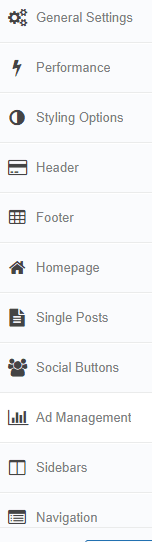
To change the background color go to, Appearance> Customize> and play around in there.
Some newer premium themes have the Theme Options at the top of the dashboard. Same thing make any changes in there. See opposite.
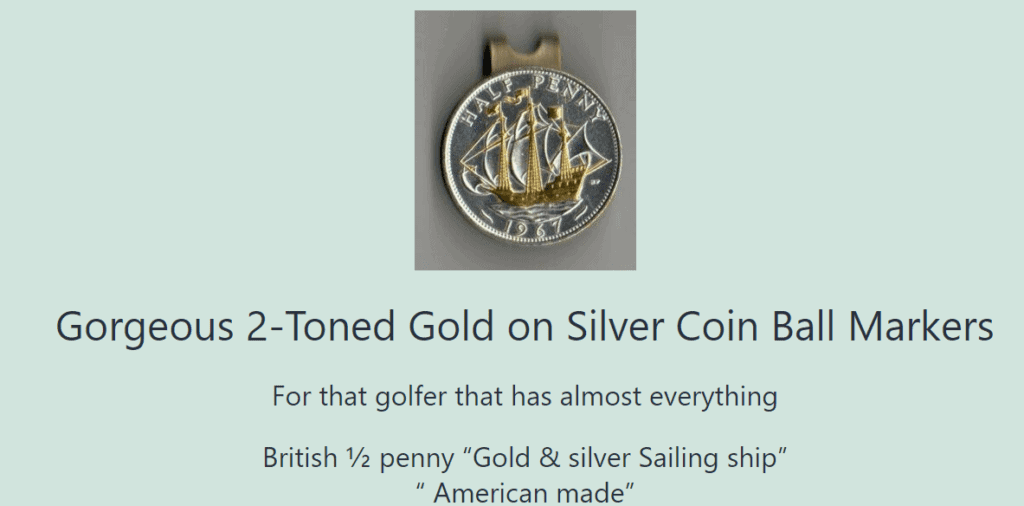
Color Comparison
Compare the one above to the one below.

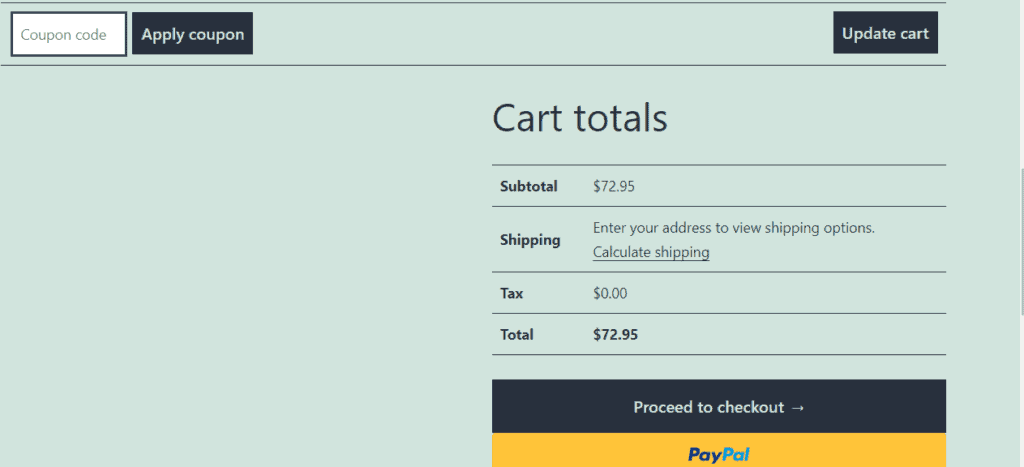
The Shopping Cart.
I don’t use a side bar on any of the product pages. There are two trains of thought on this.
- They are distracting
- They provide more information for the shopper.
I think they are distracting. For a Product page, Cart page, Checkout page, I like to keep the page on one subject. I am not talking about a gallery page, just the product page.
Where if a shopper clicks on a item in your gallery page, then, when it displays, there is nothing else but that item and its description, add to cart button etc.

If you don’t want a sidebar go to Appearance> Customize> Widgets> and remove any widgets there. Even the Search panel.
It will be replaced with a magnifying glass. Don’t worry about it.
If you are using the Block Editor, look for three buttons at the right of the task bar, click on Remove Block from the drop down list.
WooCommerce has a Personalize your store section in the set up wizard, including creating a custom home page.
This is available even if you have no products loaded. You can import some sample products, a logo (if you have one), home page, and preview your site after each step.
Include a Blog. You will use this in your marketing.
With this all done, you should have a respectable enough page to have published online ready to make sales.
Any tweaks and changes can be made later.
As you can see, WordPress and WooCommerce have a lot of options to tweak your store.
Once you have your products loaded, review your marketing strategies (a couple below), and get started selling.
A Couple of Verified Dropship suppliers for you.
These are examples of manufacturers. I am not suggesting you use them. More letting you know, that you might be surprised what is out there if your struggling for a niche.
Clothing, beach wear and some jewelry https://www.helenbellart.com/dropshipping-worldwide Been around for awhile and sells a lot on E-Bay. There is a cost to join this one.
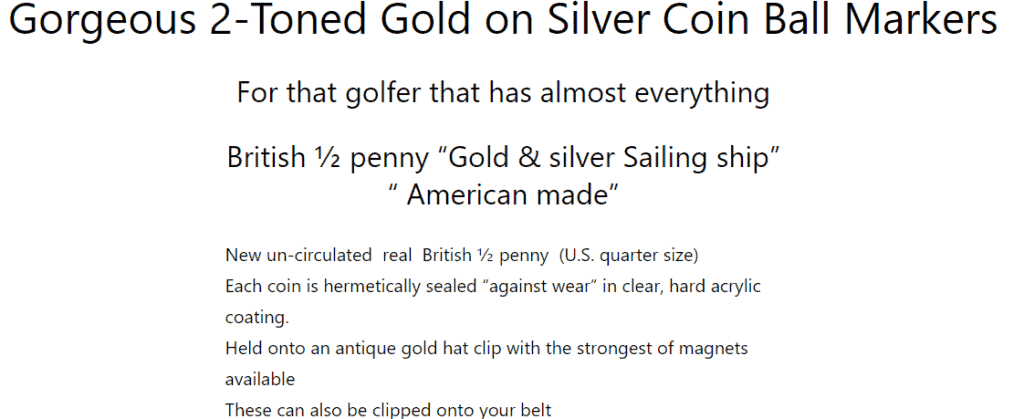
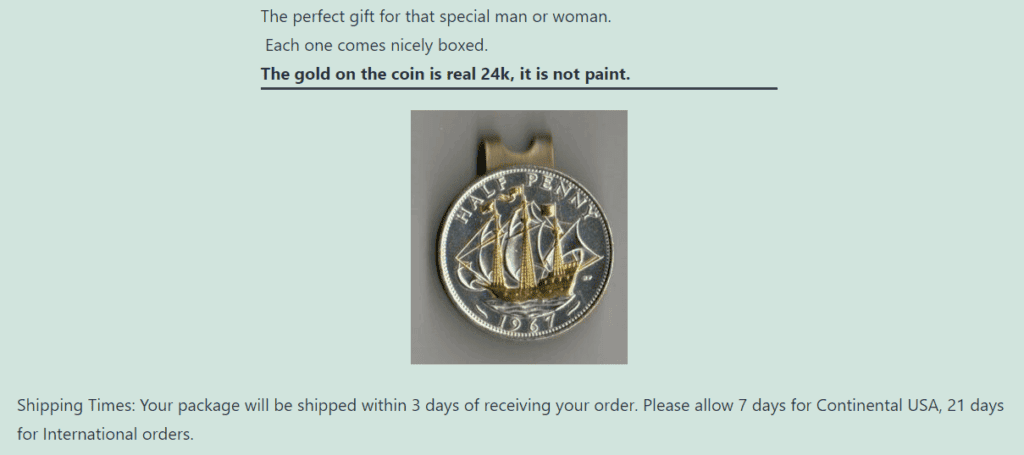
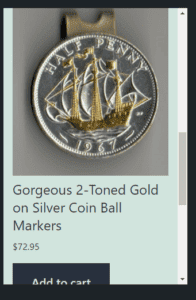
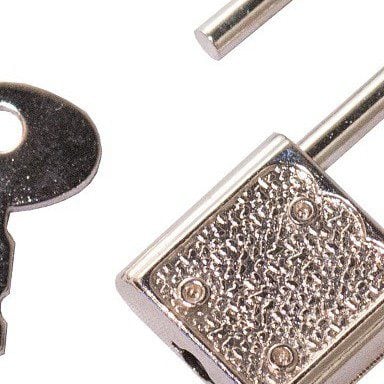
Cut coins jewelry, belt buckles, investment jewelry. https://coinjewelry.biz/drop_ship.asp This is a family business that has been around for ages.
I am not affiliated with them, and won’t receive any kick back from them. This is just to show that there are good products out there, that are not always included in the directories or suppliers with product downloaders.
Marketing.
The hardest part. Many people go straight to the book of faces. This can be deadly to your wallet, it is not the goldmine it is made out to be.
By all means use it, but start with adding some products in the FB marketplace. This is free. There are rules, so you probably will only be able to add them to your local area.
Setting up a Facebook store page can be another reasonable option. I would go to Pinterest, before becoming involved to much with Facebook.
To do more with Facebook you will need to set up a business account.
Once approved, you will have to install the facebook pixel on your site. It is a piece of code given by facebook, you install it by going to your Theme editor, and opening that, and adding between the head codes.
>Appearance> <Theme Editor><Header> look for <head> and paste it below that, and before </head> Then go back to Facebook to verify it.
Other Options for Marketing.
- Join FB groups in your product niche. Don’t spam add helpful content. You will be able to add links later
- Make up a list of celebs who use / have your product and follow them on FB, Instagram and Twitter.
- Set up a Google account and Google analytics.
I find using facebook occasionally gives some results, but the ROI has never been good there for me (or many others I know).
I mentioned Pinterest earlier. I find Pinterest way better than Facebook. Take your time setting up your account there and add your best visuals, memes, or witty sayings, build your following. You will get consistent sales on Pinterest without spending a fortune on ads.
Run one every now and then to get some more views on your products.
Another good site (you see it at the top of this page or my home page), is “We Heart It” . Like Pinterest it lets you add a link to your photos and it is (best of all), free to use.
Each time you are doing this you are building your brand, so be consistent.
Ping your Site
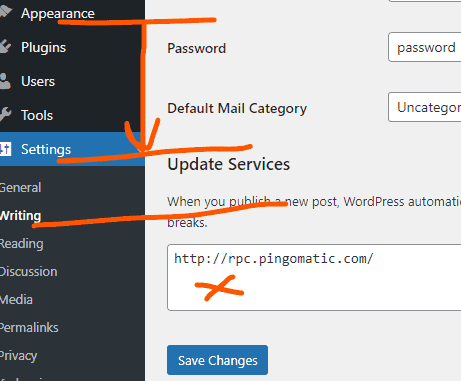
Under Appearance, click on Settings, then Writing. Once it opens scroll down and you will see Update services.
Open the PDF below, copy all those links and paste them where I have the red X.
Once a week write a blog post on something relevant to your products. then Publish it
Doing this will increase your exposure in the Google SERPS.
Other resources include E-Bay and Amazon. Not as good as they once were but you can usually get sales quickly from them.
Emails.
WooCommerce will during, or shortly after you have set up your site show you a list of email plugins. Mailchimp is my preferred option.
But which ever you choose, you need to be collecting emails from an early stage. Probably within the first week after your site is online, start setting up an email client.
As they say, the money is in the list
Am I better building with Shopify or WordPress.
The above is an example of how to build with WordPress. WooCommerce is a WordPress plugin, developed for WordPress.
You will see a lot of extensions for WooCommerce. Again, don’t rush into buying any or downloading free versions because they look interesting.
Over time you will no doubt find some of them useful, but initially sort out the promotion of your products. Start with the social sites. Pinterest, Twitter, Instagram, TicTok. Facebook. Build your Brand.
Bluehost, Siteground and WooCommerce, all have blogs giving you great advice and the best chance of success with your venture.
Shopify (without going into a comparison), on the other hand is a stand alone platform with plugins and a good blog, although I think it focuses on the book of faces too much, as a promotional vehicle for its clients to sell their products.
The downside for many people failing at E-Commerce is the recurring costs that have to be paid, before you start earning enough from your store to cover them.
If you have the money, fine, Shopify is great, but expect it to be some time before you start to see a return on your investment.
Competition is good, and although I sometimes throw rocks at it, Shopify plays a legitimate role in the E-Comm space.
Thanks for reading.
‘Til next time
Stay frosty.
Don’t forget, sign up to my newsletter for the latest on marketing and solopreneur resources, hard life experiences, advice, and creative thinking
Sources used in this article:- WordPress and WooCommerce


Exactly!! save adding the bells and whistles until you start making money.
WordPress has been such a blessing. Fists, it’s free and easy to use. And I tested options as Shopify and I still prefer WordPress. Some helpful plugins on WordPress are expensive. But I feel we can get our E-Comm shop up and rolling almost for free. Expensive addons only come in when we have some traffic.
Thanks, I will see what I can do.
I do have other posts on E-Comm. but they may not be as in-depth as you would like. One here
I never really understood what e-commerce is. I mean I know the gist of it but could you please provide me with a proper and thorough explanation. I would really appreciate it. Secondly, I wasn’t aware that you can make an e-commerce website on WordPress. Well you learn something new everyday. Thank you for this wonderful post.